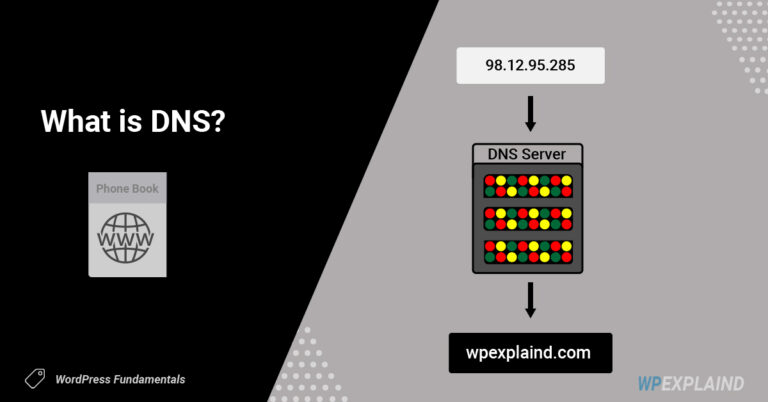
So what is DNS? DNS is often defined as the “phone book of the internet”. The main purpose of it is to translate domain names into IP addresses so that computers can understand.

An IP address, short for internet protocol, is the number assigned to your computer so that other computers may identify it. Every server has its own IP address.
Step 4 to creating a website is pointing your domain to your server. You should have already completed the first three steps below:
Prerequisites:
- Step 1: Purchase a domain name
- Step 2: Purchase hosting
- Step 3: Add a website/ Install WordPress
If you have finished the first three steps you are ready to take your website live by pointing your domain to your host.
Pointing Your Domain Name To Your Servers
If you have purchased a domain, and secured hosting, the next step involves pointing your DNS (domain name servers) to your host. When you purchase hosting, they will provide you with 2 records for their name servers.
Look at the example below:
Example of Nameservers
ns1.giow1046.siteground.us | ns2.giow1046.siteground.us
Locate Your DNS In Siteground
If you are using Siteground for hosting you can locate these values in your site tools dashboard. If you have been following along, you should have your nameservers stored in a document already. If not, follow the steps below to find this information.
Login into My Siteground
Click on Websites in the header navigation.

This will list your websites You may only have one listed.
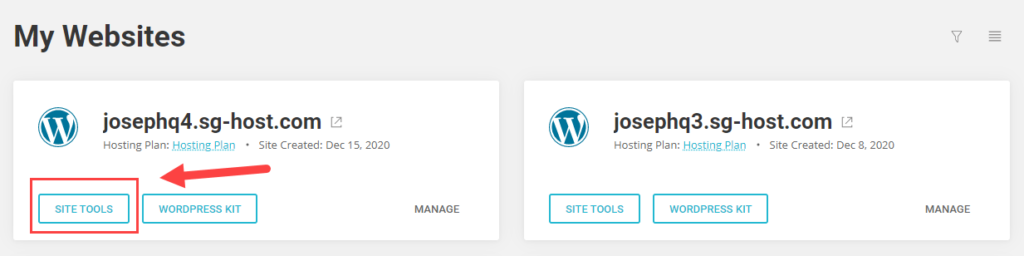
Click on Site Tools.
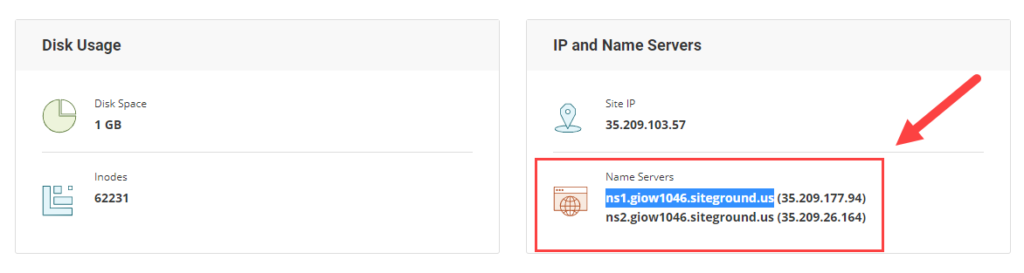
You will find your nameservers about halfway down the page to the right. It will look similar to the image below:
Copy those values into notepad or similar program and login to your domain name registrar (Namecheap).
Click on manage domain.

Adding Your Nameservers
Scroll down to where it says nameservers and select “custom DNS” from the drop down box. (If you purchased your domain from another registrar, it may not be the same process)
If you have purchased your domain name from Namecheap, our recommended registrar, it will look like the following:

Add the two nameservers provided to you by your host and click on the checkbox.
Note: It can take up to 48 hours for these changes to propagate but it usually happens within 30 minutes.
Recap
If you have configured your DNS correctly, your domain name should now point to your host and your website should now be live.
You can now login to your site with the credentials you created. Login to your site via yourdomain.com/wp-login.php (replace “yourdomain.com” with your actual domain.
If you have any questions feel free to comment below.
Next Steps
Now that your site is live you can begin making some changes to the design, install a theme or plugin, but it is still not secure so I suggest installing an SSL certificate.
If you chose Siteground as your host, this will be provided to you free as part of your hosting plan.