Your theme consists of many parts including your header, footer, single post template and posts archives, but editing your theme requires knowledge of PHP which I’m assuming you do not have. Luckily, there is an easier, more visual way to accomplish this.
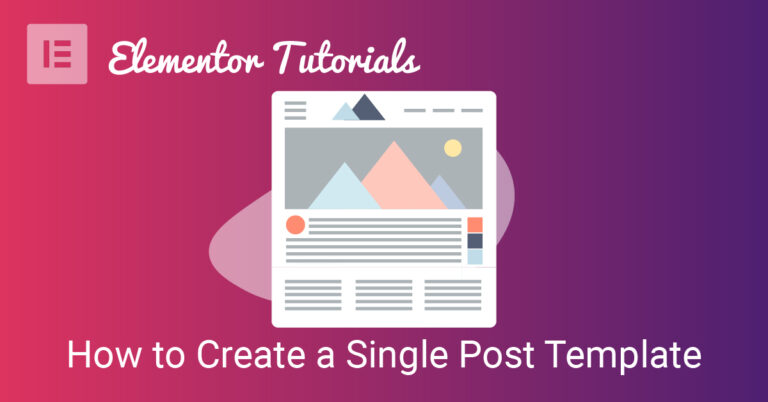
In this tutorial, I will show you how to create a single post template using a drag and drop, visual editor called Elementor.
First I’ll show you how to create one using the pro version and then the free version with an additional helper plugin.
Tools required: Elementor Pro, and a Self hosted WordPress site.
Step 1: Install and activate Elementor Pro
If you already have Elementor Pro installed then you can skip this step. For help installing a plugin, read how to install a plugin.
Step 2: Create a Single Post Template
Open the theme builder and create a new single post template by hovering over templates > theme builder in sidebar of your WordPress dashboard.
This will open up the theme builder. Click add new.
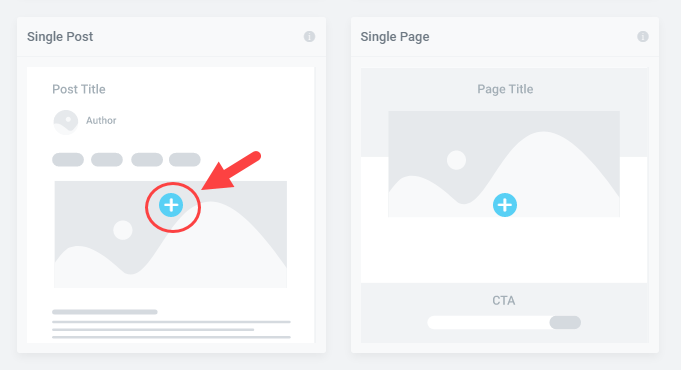
Next, click the plus icon to select single post. This will open up the library and provide you a selection of premade templates.
Note: If you’re using the old theme builder, clicking “add new” will trigger a popup where you will name and select the type of template from a dropdown.
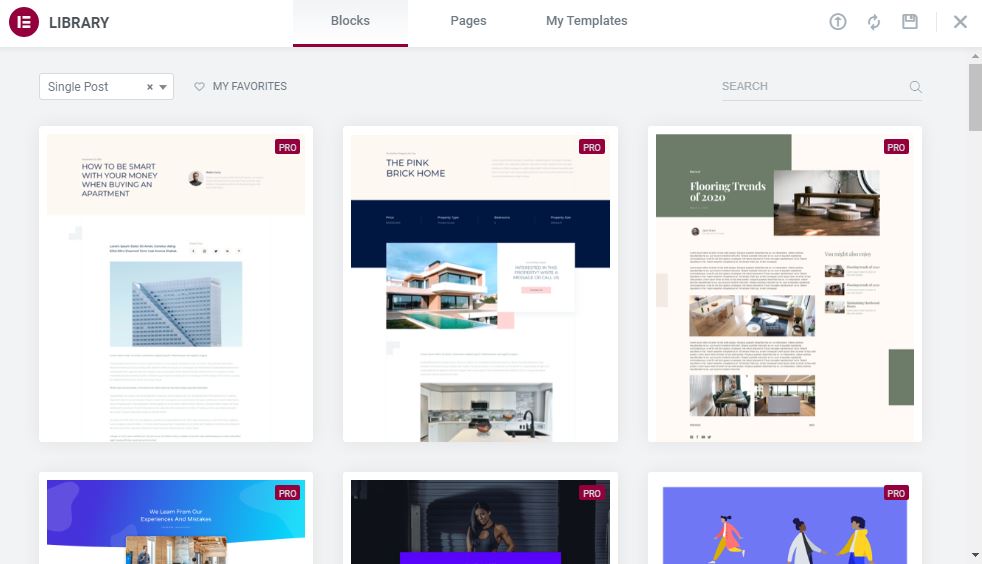
You can either add a premade design and customize it or start from scratch. Click the “X” in the top right hand corner to start from scratch.
If you’re starting with a pre-made design, simply customize it to match your brand. If you’re creating your own you will need to add some elements.
Add Elements
This will open up a blank page where you can add the following dynamic elements to your template:
- Post title
- Featured image
- Post content
- Post excerpt
- Post meta (author, date, time)
- Author box
- Comments
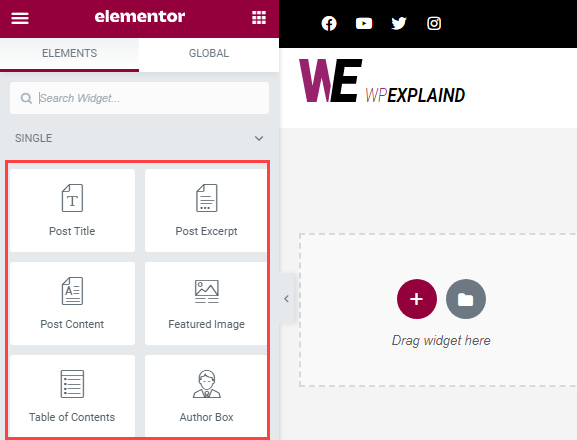
Add any elements you wish to include in your single post template. At the very least I suggest adding the above mentioned elements.
If you have at least one post published, Elementor will pull in that content so you have a visual representation of what your content will look like.
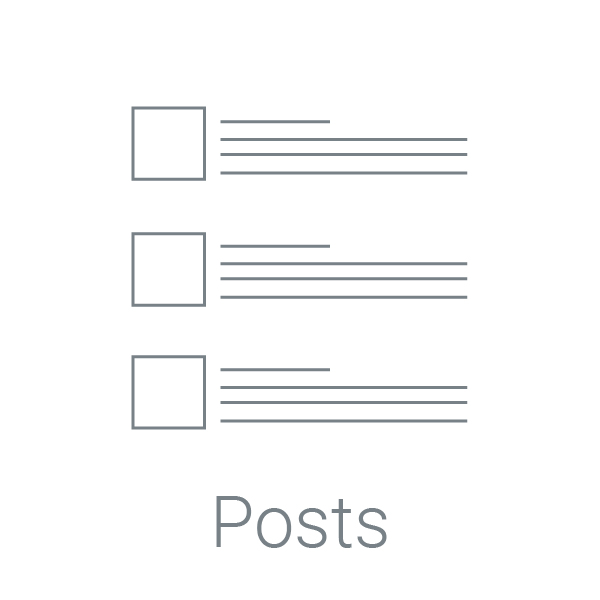
Add Related Posts
Fortunately, Elementor has their own related posts engine so you will not need an additional plugin. Simply add their posts widget and customize it.
Drag and drop the posts widget on to the page.
Now, you will be able to customize the layout, query, and whether or not to include pagination.
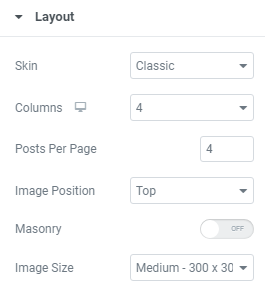
Customize the Layout of Your Related Posts
Select which skin you prefer; classic or cards, the number of columns and posts to display, image position, image size and so on.
Use what makes sense for your site.
Query Settings
This is where you can choose your data source, what to include and exclude and a fallback in case nothing matches the query. Your data source options are:
- Posts
- Pages
- Manual Selection
- Current Query
- Related
- Any custom post types you may have

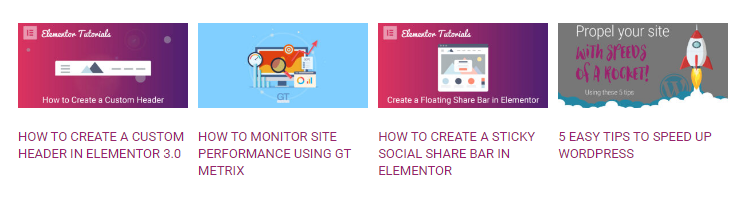
Related Posts Example
Select either “posts” or “related” from the drop down. If you have a custom post type, you could even select that here.
Exclude current post, toggle on “avoid duplicates” and select the fallback “recent posts”.
Format Your Content
Now it’s time to format your template. Add any colors, padding and margins so that your content matches the desired look. You can format everything on the page, including sections and columns.
Step 3: Add Conditions
Conditions determine where you template will be used throughout your site.
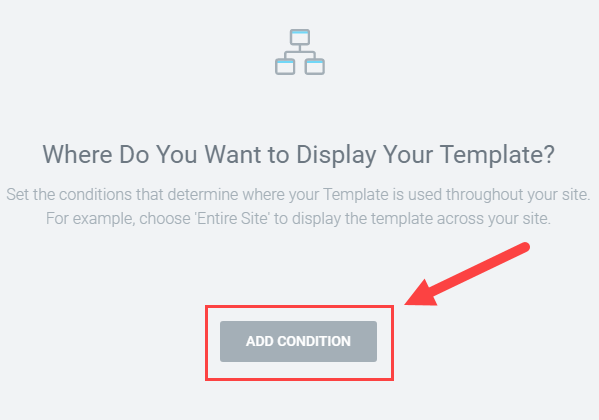
Add a condition. Select all posts from the drop down menu. Then click save and close.
Now that you have learned how to create a single post template, all of your posts will be formatted this way.
Your single post template is just one of many theme parts. Start customizing the rest of your site.
Adding share buttons to your design.
Conclusion
If you’re looking for an easy way to customize your entire site without having to learn how to code various different programming languages, then Elementor Pro might be just what you are looking for.