Everything you need to know about custom post types in an easy to follow tutorial. No coding experience necessary.
In this tutorial we are going to use Jet Engine to create a custom post type, fields, and taxonomies and then display them dynamically with Elementor Pro in our post archives and single post template.
So, what is a post type?
What Is A Custom Post Type In WordPress?
Post types are a way of categorizing different types of content in WordPress. Each type has specific fields. Standard posts typically consist of the following fields: title, editor, featured image, excerpt, and comments (the number of supports are dependent on your theme).
But what if you wanted to add additional fields that you don’t need for normal posts? That’s where custom post types come in.
WordPress ships with their own native content types.
Native Post Types
Here are few that are native to WordPress which you are probably already familiar with.
- Pages (hierarchal)
- Posts
- Attachments
- Revisions
- Navigation menus
There are also plugins that add their own. For instance, Woocommerce adds “products” with various fields needed to display the product information properly. This is just one instance, but you get the idea.
Why Would You Want To Create Your Own?
The easiest way to explain this is to give you an example. On this website, I wanted to create a database of Elementor addons, but I was going to need specific fields that wouldn’t apply to regular posts so I created a new post type called “addons”.
Then, I created the following custom fields for this custom post type:
- Widgets– the number of widgets each addon has
- Price– how much it costs
- Developer– who developed the plugin
- Lifetime License– whether or not there is an option to purchase a lifetime license
- Free Version– whether or not there is a free version of the plugin
- Addon Name– the name of the addon
- Link– the hyperlink to the addon
If you own a construction company, you may want to add a custom post type called portfolio or services with various fields specific to that content type.
Maybe you’re thinking of creating a recipe or review website and would need a different set of fields where the normal “posts” just wouldn’t be sufficient. There are a million and one use cases for this; these are just a couple examples that come to mind.
How To Create A CPT With A Plugin
Create a custom post type in 5 easy steps.
- Install and activate Jet Engine plugin
- Add new post type
- Add labels
- Add meta fields
- Create new taxonomies
- Admin columns (optional)
Install And Activate Jet Engine Plugin
You can purchase single site license of Jet Engine for $26/ yr or grab the entire Crocoblock set as a whole. This is an extremely powerful plugin with a lot of features. It is one of my favorite Elementor Addons.
Step 2: Add New Post Type
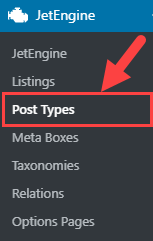
After installing you will see a new top level menu called Jet Engine. Hover over it and select post types from the drop down menu.
Click “add new” from the top of the screen.
Add your post type name and slug to the general settings.
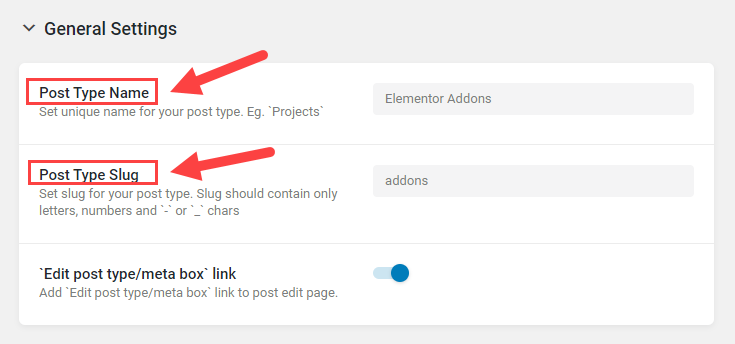
Typically the name and slug are the same but I opted for a shorter permalink structure.
Step 3: Add Labels To Your Post Type
Labels are used throughout the WordPress dashboard UI. There are a total of 20 of them. WordPress uses these labels to reference your post type for different actions on various screens. You can see an example of some of them below:
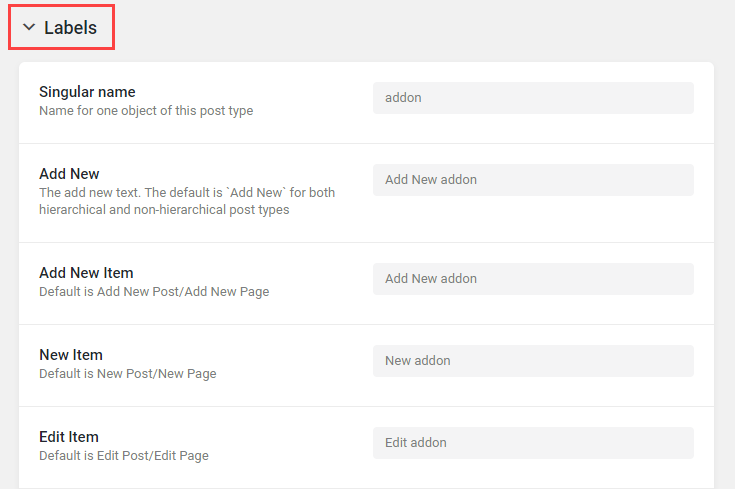
This is where you can customize the labels used for your post type (type in the singular name and then click each input to auto generate the remaining labels).
Once you finish creating your labels, the next step is to add meta fields specific to your post type.
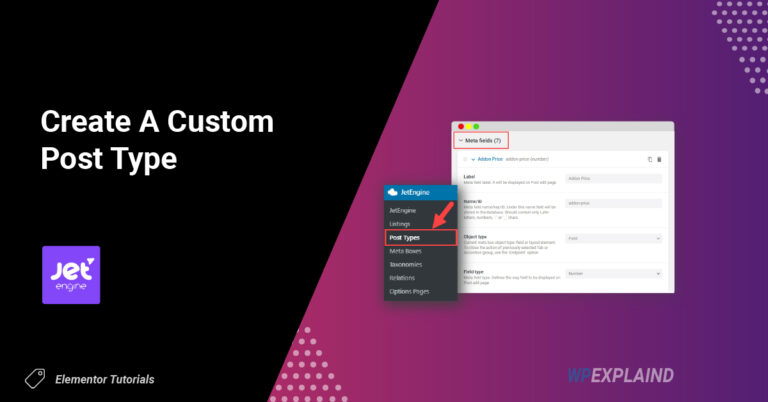
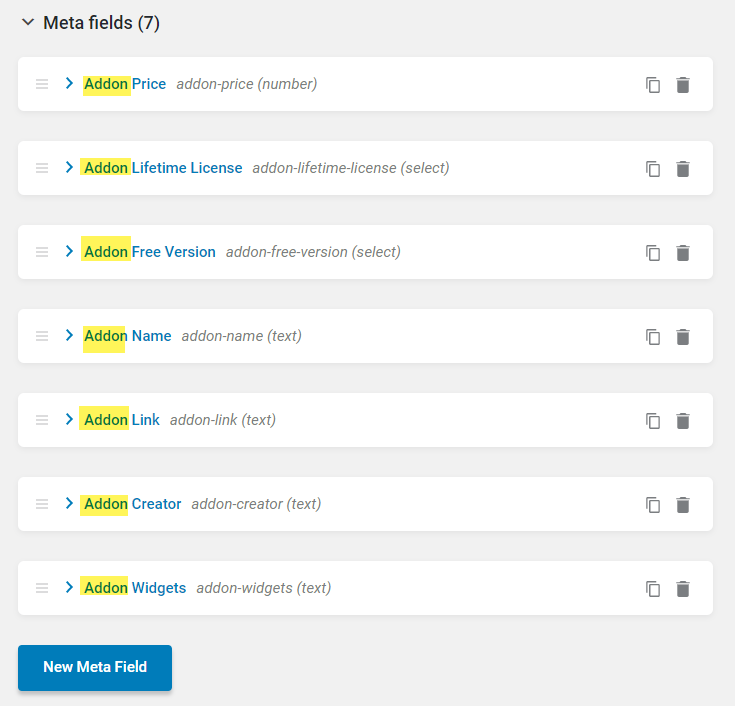
Step 4: Add Meta Fields
Custom fields are a way of adding additional information to a post. Sticking with my “addons” example, I needed to add 7 new fields listed below:
- Widgets– the number of widgets each addon has
- Price– how much each one costs
- Developer– who developed the plugin
- Lifetime License– whether or not there is an option to purchase a lifetime license
- Free Version– whether or not there is a free version of the plugin
- Addon Name– the name of the addon
- Link– the hyperlink to the addon
Here is an example of the “price” meta field I created for my post type “addons”.
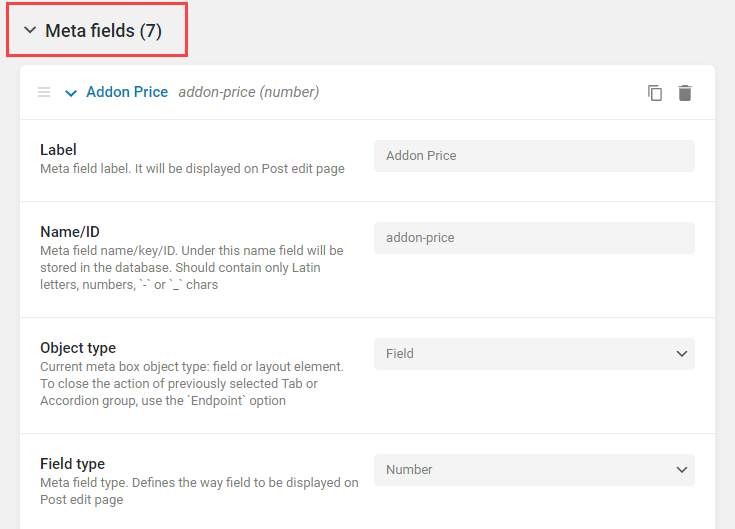
Fill in all of the values for each field you wish to add.
Notice how I appended the post type name (“addons”) as a prefix for the “price” field… This is common practice and helps to avoid any conflicts.
I created a total of 7 fields for this new custom post type as you can see in the image below.
To add a new field simply click on add new.
All of the newly created fields will appear below the post editor. This is where you will fill in the values for each post you create. You can see an example of a post I created about Elementor Pro below.
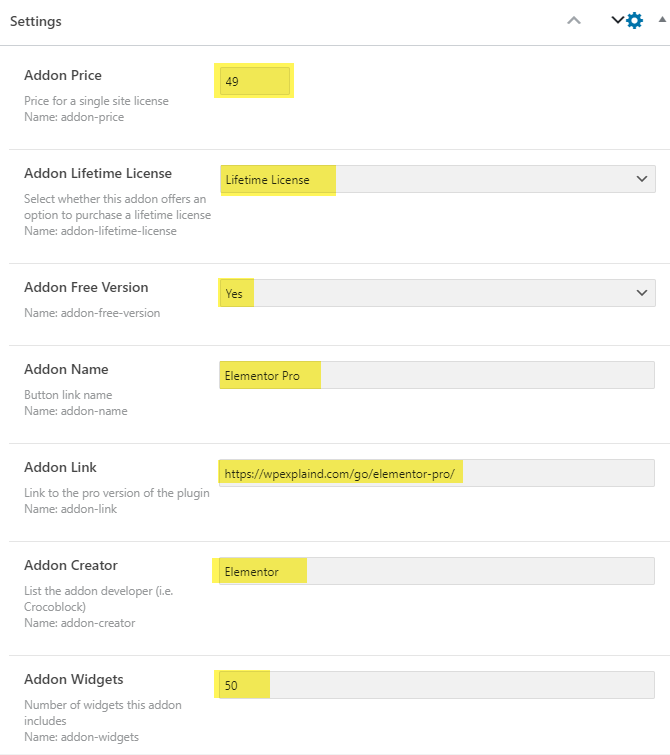
I filled in all of the values (highlighted in yellow) for those fields. Later, I will show you how to display those fields on the front end dynamically.
You may also want to add “Admin Columns”.
Step 5: Add Admin Columns (Optional)
Admin columns are a way to display information on your “all posts” screen. This is an optional step so it’s not required but it allows you to see an overview.
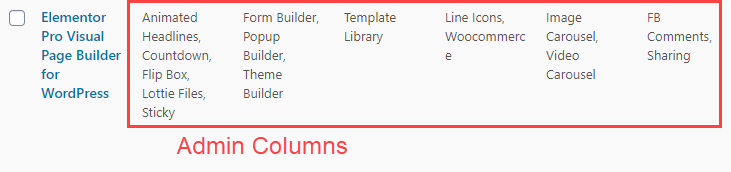
I’ve added all of my new taxonomies to my admin columns. This gives me a little information about each addon without having to view or edit.
The next step is to create custom taxonomies for your new CPT.
Step 6: Create New Taxonomies
A taxonomy is just a way to group content together. By default, WordPress comes with two out of the box; categories and tags. I created 7 new taxonomies for my “addons” CPT.
- Animations
- Customizations
- Media
- Social
- Integrations
- Navigation
- Extras
To create your own simply navigate to your Jet Engine menu in your WordPress dashboard, click on taxonomies and add new. This will be very similar to creating a CPT.
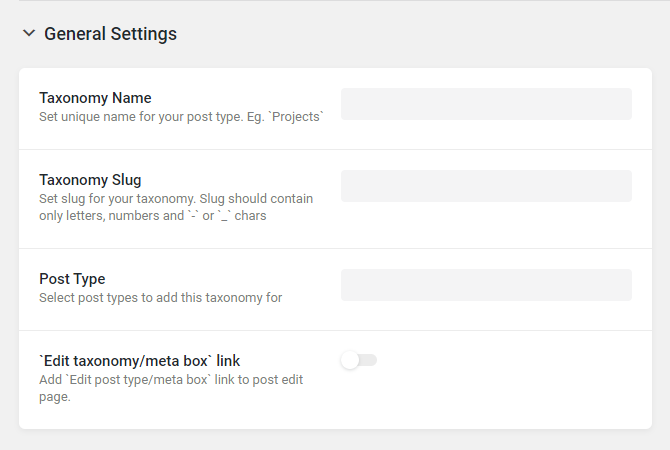
Fill in all of the required fields for general settings and labels. Under advanced you can choose whether or not it is hierarchal (has descendants) like categories or non-hierarchal like tags. (I decided that I wanted mine to be hierarchal but choose what’s best for you)
The next step is to decide how you want to display this information. We will accomplish this by editing the single post template using Elementor Pro.
Display Your Fields In A Single Post Template
We are going to edit our single post template and add all of our fields dynamically. I’m not going to go into detail on how to create one here, so if you’ve never created one, follow this tutorial: how to create a single post template in Elementor.
Steps For Displaying Your Fields
One: Open your single post template in Elementor.
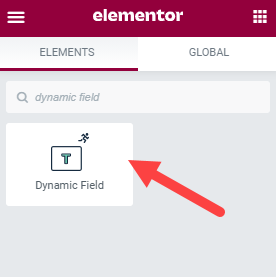
Two: add the dynamic field widget; one for every field.
Three: Select the source “meta data”
Four: Select the meta data field from the drop down menu
Format and style the output however you wish with the remaining options.
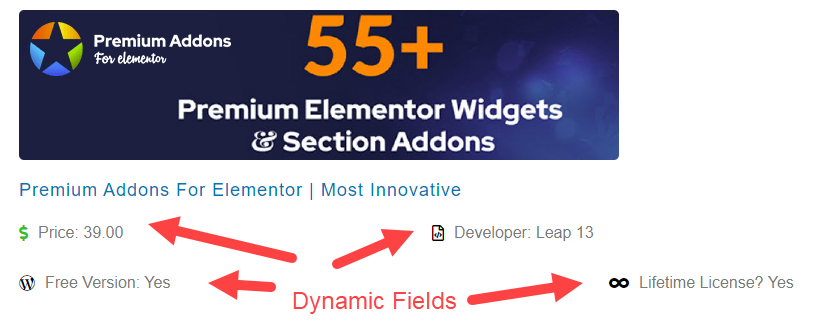
Here is an example of all my dynamic fields being displayed in my single post template.
All of this information comes from the 7 fields I created earlier. You may only count 6 but the button actually consists of two fields. One is the link and the second is the name of the addon. I’ve also added icons for each.
Once you have finished adding your fields to your template, click save. Now every time you add a new post, fill in those fields and they will be displayed dynamically.
You can do the same thing for your archive page.
Display Your Custom Fields In Your Archive Template
For this you will need to create a listing grid template using Jet Engine and add that listing grid to your archive template.
Step 1: Create A Listing Grid
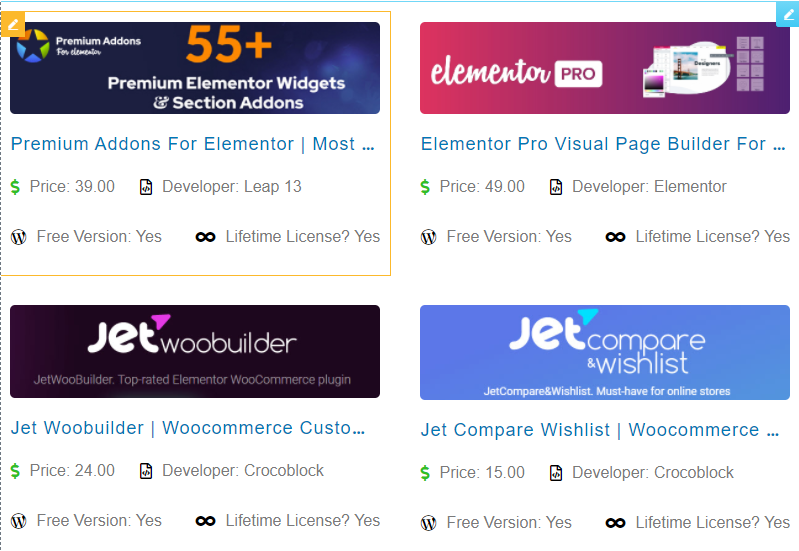
Create a new listing by hovering over Jet Engine menu and select listings > add new. Add any elements you wish to display in your grid. In the example below, I added the featured image, title, and four of my custom fields.
I will be using this listing in my archive template.
Save it and navigate to Elementor Theme builder.
Step 2: Add Your New Listing To Your Archive Template
Open your post archive template or create a new one using Elementor theme builder. Add the listing widget to the page.
Select your new created listing from the drop down, choose the number of columns you want to display, set the status to publish and choose the number of posts you wish to display.
As you can see, all of those fields I added to my listing grid are now displayed in my archives. You can also add any number of other elements to the page.
The listing widget does not come equipped with pagination so you need to add a pagination widget separately.

Set it to ajax, page reload or mixed. I prefer to use ajax as I think it provides a better user experience.
Save your template and exit.
Conclusion
You have learned how to create a new post type, taxonomies, and fields and how to display that information in both your single and archive templates using Jet Engine plugin and Elementor Pro.
If you have any questions please feel free to leave a comment.